Simple Flat Roof Maintenance Checks

Flat roof maintenance isn’t complicated, expensive, or time-consuming. It’s a short list of simple checks, done regularly, that catches small problems while they’re still small. Most premature roof failures aren’t caused by bad materials — they’re caused by years of nobody looking. This is the routine that prevents that.

When to do these checks

The National Roofing Contractors Association (NRCA) recommends inspecting roofs at least twice a year — in spring and fall — plus after any severe weather. Carlisle SynTec’s building-owner manual lays out the same rhythm and adds a trigger most homeowners miss: after other trades have been on the roof. An HVAC service visit or a satellite dish installation can leave punctures or disturbed flashing behind. For Rio Rancho, that means spring, early summer before monsoon season, fall after the storms, and any time someone’s been working up there. Each round takes 15 to 30 minutes.

Check 1: Clear the drains

Clogged drainage is the single most common preventable roof problem. Scoop leaves, cottonwood fluff, gravel wash, and sediment out of interior drains, scuppers, and gutters; make sure strainer baskets are seated; check that downspout outlets aren’t blocked. During monsoon season, check more often — one storm can undo a clean drain overnight.

Check 2: Remove debris from the surface

Branches, trash, piled leaves — get them off. Debris traps moisture against the membrane, and dragging it across the surface scuffs protective coatings and surfacing. Lift debris off; don’t drag it. While you’re at it, look for anything sharp that could puncture the membrane and anything heavy that shouldn’t be there.

Check 3: Glance at flashings and sealant

Walk the perimeter and each penetration — vents, pipes, curbs, parapet walls. You’re looking for sealant that’s cracked, crazed, or missing, and flashing that’s lifted or loose. A small bead of compatible sealant on a minor gap is fine homeowner maintenance; widespread sealant failure or lifted flashing is a job for a roofer, not a caulk gun.

Check 4: Scan the membrane

Look over the membrane field for the usual suspects: open or lifting seams, blisters, punctures, and areas of surface wear. This is the quick version — our full guide to what to look for during a flat roof inspection covers each of these in detail, including what a professional inspection adds.

A worker unrolling roofing membrane on a flat roof.

Check 5: Watch how it drains

The simplest test in roofing: look at the roof within two days after rain. Water that’s gone means drainage works. Water that’s still standing 48 hours after rainfall ends meets the NRCA’s definition of ponding water — and persistent ponding needs attention, not acceptance.

Check 6: Look from inside

Finish inside the house: check ceilings and upper walls under the roof for new stains, peeling paint, or musty odors. Interior signs often appear before exterior ones are obvious — and they tell you where to look harder on your next rooftop round.

What not to do

  • Don’t pressure-wash the membrane. High-pressure water drives moisture into seams and strips protective surfacing and coatings. A soft broom and a garden hose are the most aggressive cleaning a roof needs.
  • Don’t use petroleum-based products on single-ply membranes. Solvents, greases, and some asphalt-based products can degrade EPDM and other single-ply materials — manufacturer care guides specifically warn against them. If you’re unsure whether a product is compatible, don’t apply it.
  • Don’t coat over problems. A coating seals a sound surface; it doesn’t fix wet insulation, open seams, or ponding. Restorative coatings are a legitimate maintenance tool for an aging-but-sound roof — applied over problems, they’re just expensive paint.
  • Don’t walk the roof more than necessary. Every footstep is wear. Do your checks, then get off.

Keep a simple log

Photograph what you find and note the date — a phone folder with a few pictures and a line or two of notes per check. Over time it shows whether a blister is growing or ponding is worsening, and it gives any roofer you hire a head start. Carlisle’s building-owner guidance emphasizes keeping maintenance records, partly because warranty coverage can depend on documented upkeep.

When to hand it to a professional

This routine covers the visible and the simple. Hand it off when you find recurring problems, anything that suggests trapped moisture, damage after a major storm, or anything you’re unsure about. A professional inspection — systematic, close-up, with moisture detection when warranted — is the right next step, and it’s far cheaper than the repair a missed problem becomes.

Maintenance is the least glamorous part of owning a flat roof and the highest-return one. Thirty minutes, a few times a year, is what stands between a roof that ages gracefully and one that fails early. And when your checks turn up something worth a second opinion, request a roof assessment or call (505) 578-4300 — we’ll take a look and give you a straight answer.

Post-Storm Roof Checks for Flat Roofs

Rio Rancho’s monsoon season doesn’t do subtle: intense downpours, driving wind, and the occasional hailstorm, all in a single afternoon. Your house can look fine from the driveway while your flat roof took a beating you can’t see from the ground. That’s why the National Roofing Contractors Association (NRCA) recommends inspecting roofs after any severe weather — and why Carlisle SynTec’s building-owner manual specifically calls for post-storm inspections. Damage caught early is damage that stays cheap.

Safety first, timing second

Don’t climb up while the roof is still wet, while wind is still gusting, or if there are downed power lines anywhere near the house. Wait for dry conditions. Start from the ground and a ladder: binoculars will show you most of what you need to see, and anything that needs a closer look can wait a few hours until the surface is safe to walk.

What storms do to flat roofs

Wind

Wind attacks the edges first — perimeter flashing, coping, and membrane terminations — and works inward. Gusts can peel back flashing, lift membrane at corners and edges, and turn ordinary debris into projectiles. Branches, patio furniture, and wind-blown gravel puncture membranes and scour protective surfacing. On ballasted roofs, wind can displace the stone ballast and leave membrane exposed.

Hail

Hail bruises more than it breaks. On granule-surfaced modified bitumen, hail knocks mineral granules loose — you’ll see dark, pitted spots where the membrane shows through. That granule layer is the membrane’s UV armor, so widespread granule loss shortens the roof’s remaining life even where nothing is visibly torn. On single-ply membranes like TPO and PVC, hail damage is subtler — fractures or thinning that often take a trained eye and a close-up inspection to find. The honest rule: if your neighborhood got significant hail, have a professional look. Homeowner hail assessment on flat roofs is genuinely unreliable.

Water

Monsoon downpours can overwhelm drains faster than they clear — especially when the first flush of rain carries a season’s worth of debris into scuppers and strainers. Wind-driven rain pushes water sideways into flashing details that shed normal rainfall without trouble. After the storm, check where water stands: anything still there 48 hours after the rain ends meets the NRCA’s definition of ponding water.

Your post-storm checklist

Work through this in order — ground first, roof only if it’s safe:

  • Debris. Branches, trash, displaced gravel. Remove it gently — lift, don’t drag, so you don’t scuff the membrane.
  • Drains and scuppers. Storm debris chokes them fast. Clear every drain, scupper, and gutter, and reseat strainer baskets.
  • Membrane surface. Look for punctures, tears, lifted seams, and areas where ballast or surfacing has been scoured away.
  • Flashings and edges. Check perimeter flashing, coping, and metalwork for lifting, bending, or missing sections — wind starts at the edges.
  • Penetrations. Vents, pipes, and curbs: look for displaced flashing or cracked sealant.
  • Ponding. Note where water stands, and check again in 48 hours.
  • Inside the house. Check ceilings and upper walls for new stains. Remember that water travels — the stain won’t necessarily sit below the damage. Our guide to water stains on your ceiling walks through what to do next.

Document before you disturb

Photograph everything with timestamps: damage, debris, ponding, interior stains. Note the storm’s date and what it brought — hail, high wind, or just heavy rain. This record helps your roofer diagnose faster, and it matters if an insurance claim enters the picture. Document first, then clear debris and make temporary protections — not the other way around. If you plan to involve your insurer, this documentation is the foundation of the claim: contact your insurer promptly, keep receipts for any emergency measures, and don’t authorize permanent repairs before the adjuster has seen the damage — unless the roof is open to the weather and waiting would cause more harm.

What a professional post-storm inspection adds

A roofer’s post-storm visit is the same systematic inspection described in our guide to what to look for during a flat roof inspection — seams probed by hand, flashings checked up close, drainage verified — plus storm-specific attention to wind-uplift damage at perimeters and hail bruising across the field. It should end with a written report: what was found, what’s urgent, and what can wait.

A roofer with torch equipment standing on a flat roof.

Call now or keep an eye on it?

Get a professional out promptly if you see torn or displaced membrane, missing or lifted flashing, active dripping inside, deep ponding, or any sagging underfoot. If the membrane is torn and more rain is forecast, a properly secured tarp over the damaged area can keep water out until repairs happen — but treat it as a stopgap, not a fix, and don’t walk a damaged roof to place one if it isn’t safe. Monitor if all you found was debris (now cleared) and shallow water that drained within a couple of days — but still take a follow-up look after the next storm.

A note on storm chasers

Hailstorms bring out door-to-door roofers — some legitimate, some not. You don’t have to decide anything on your doorstep. Get every proposal in writing, verify that the contractor is licensed (New Mexico licenses roofing contractors through the Construction Industries Division, and you can check a license before hiring), and never pay a large deposit before work begins. A reputable roofer is happy to be checked out; a storm chaser is in a hurry.

Storms are when small weaknesses become real problems — which is exactly why the post-storm check exists. If you’d like a trained eye on your roof after a storm, request a roof assessment or call (505) 578-4300.

Ponding Water on Flat Roofs: What You Should Know

Ponding water is exactly what it sounds like: rainwater that sits on your flat roof instead of draining away. Every flat roof holds some water right after a storm — that’s normal. Ponding is what happens when it stays. The National Roofing Contractors Association (NRCA) defines ponding water as water that remains on the roof 48 hours or more after rainfall ends, under conditions favorable for drying. That 48-hour line is the difference between a puddle and a problem.

Why the fuss over standing water? Because a flat roof is a system designed to shed water, not store it. When water lingers, it works on every part of that system — membrane, seams, flashings, structure — around the clock. Here’s what causes ponding, why it matters, and what actually fixes it.

Why ponding happens

Flat roofs aren’t flat. They’re built with a slight slope — toward interior drains, scuppers, or the roof edge — so water has somewhere to go. Ponding means something along that path has failed:

  • Clogged drainage (the most common cause). Leaves, cottonwood fluff, gravel wash, and sediment block drains and scuppers. During Rio Rancho’s monsoon season, a single storm can dump enough debris to choke a scupper that was draining fine in June.
  • Low spots in the structure. Decks can deflect under load or settle over time, creating shallow bowls that hold water.
  • Compressed insulation. Heavy rooftop equipment — or foot traffic in the wrong spot — can compress insulation boards, forming dams around the compressed area.
  • Design shortfalls. Some older roofs simply don’t have enough slope, or the drains are spaced too far apart for the roof area they serve.

Why ponding is a problem

Weight

Water is heavy — just over five pounds per square foot for every inch of depth. A ponded area a few inches deep over a few hundred square feet adds thousands of pounds of load the structure wasn’t designed to carry continuously. Worse, weight causes deflection: the deck sags slightly under the water, the sag holds more water, and the water causes more sag. Engineers call this progressive deflection, and it’s how a minor low spot becomes a major one.

It never lets the membrane rest

Membranes are built to get wet and dry out in cycles. Ponding keeps the surface constantly wet, which accelerates aging and keeps every seam, flashing edge, and penetration detail submerged and under test — permanently. Standing water also collects dirt and grit, turning the pond into an abrasive slurry that wears the membrane whenever anyone walks through it, and it can support algae and vegetation growth that roots into some membrane types.

It can affect your warranty

Most single-ply manufacturers’ warranty documents require positive roof drainage and define ponding water on the same 48-hour basis the NRCA uses. Persistent ponding can put warranty coverage at risk — another reason to treat the 48-hour mark as a real deadline, not a suggestion.

How to tell whether your ponding is a problem

Do the 48-hour test: look at the roof within two days after rain ends, in dry weather. Water that’s gone means drainage is working as designed. Water that’s still there is ponding — and what you do next depends on the details:

  • Where it ponds. Water sitting right around a drain usually means the drain is clogged — the cheapest fix there is. Water ponding in the middle of the field, far from any drain, points to slope or structural issues.
  • How deep and how wide. A shallow “birdbath” is worth monitoring; several inches deep over a large area deserves a professional look soon.
  • Whether it’s getting worse. Photograph the pond after storms, from the same spot, with something for scale. A growing pond means progressive deflection — don’t wait on that one.
  • Whether you have overflow drainage. Building codes generally require secondary (overflow) drains or scuppers where the roof edge rises above the roof surface — outlets that only engage if the primary drains are overwhelmed. If your roof lacks them, a single clogged drain can turn a storm into a structural load event.

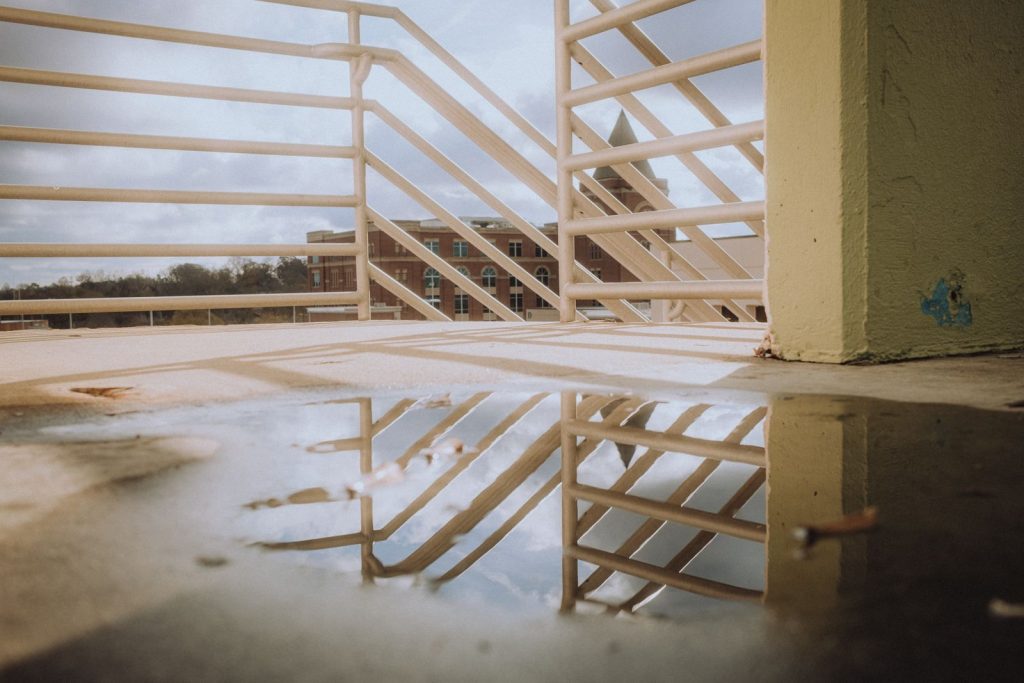
Standing water pooled on an urban rooftop surface after rain.

What actually fixes ponding

Start with the drains

Clear every drain, scupper, and gutter of debris, and make sure strainer baskets are seated. This alone resolves a surprising share of ponding complaints — which is why drain clearing is a standing item in our simple flat roof maintenance checks. If ponding persists after the drainage path is fully clear, the problem is slope or structure, not debris.

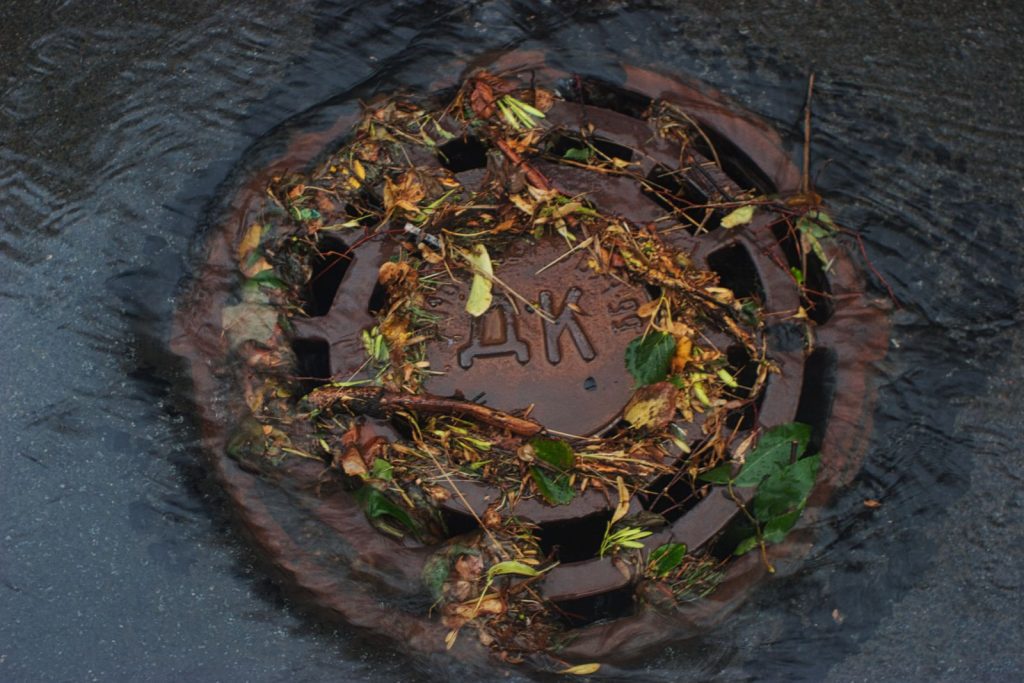
A drain grate clogged with wet leaves and debris during rainfall.

Rebuild the slope

Real slope fixes include tapered insulation (rigid boards cut to create fall toward drains), crickets or saddles that divert water around rooftop equipment, and adding drains or scuppers where the roof area per drain is too large. These are professional jobs — they change how the whole roof sheds water — but they’re the only fixes that address the cause rather than the symptom.

What doesn’t fix ponding: coatings

This one matters because it’s a common misconception. A roof coating seals and protects the membrane surface, but it doesn’t create slope — water will stand on a coated low spot just as happily as on an uncoated one. Coatings are a legitimate way to extend the life of a sound, well-draining roof (see our roof coatings and restoration service), but they are not a drainage solution. Anyone who offers you a coating as the fix for ponding is selling you the wrong product.

When ponding means something bigger

Get a professional assessment if the pond is deep, growing, or persists despite clear drains — or if the roof feels soft or visibly sags near the ponded area. Those are signs of saturated insulation or structural deflection, and both need eyes-on evaluation, not guesswork. A proper assessment maps the low spots, checks the insulation beneath them for trapped moisture, and lays out options in order of cost — the same decision our repair-versus-replacement guide helps you think through.

A little standing water the day after a storm is just weather. Water that’s still there two days later is your roof telling you something. Listen early, and the fix is usually simple — clear a drain, adjust a scupper, plan a tapered repair. Wait, and water will keep working on the problem for you. If you’d like a straight answer about ponding on your roof, request a roof assessment or call (505) 578-4300.

What to Look for During a Flat Roof Inspection

You don’t need to be a roofer to inspect your flat roof — you just need to know what matters and what doesn’t. A homeowner inspection is not the same as a professional one, but it serves the same goal: catching small problems while they’re still small. Most of the expensive flat roof failures we see started as something a routine inspection would have caught months earlier.

There are two kinds of inspection worth doing. The first is yours: a careful walkover — or a look from a ladder, if getting on the roof isn’t practical — a couple of times a year. The second is a professional’s: systematic, close-up, and able to find moisture hiding inside the roof assembly. This article covers the first in detail, and explains when the second earns its keep.

How often to inspect

The National Roofing Contractors Association (NRCA) recommends that roofs be inspected at least twice a year — in spring and fall — plus after any severe weather. Carlisle SynTec’s building-owner manual lays out the same cadence, and adds one more trigger homeowners often forget: after other trades have worked on the roof. An HVAC technician, satellite installer, or anyone else up there can puncture a membrane or disturb flashing without ever realizing it.

For Rio Rancho, a sensible rhythm is spring (after winter’s wind and freeze-thaw cycles), early summer before monsoon season, and fall (after the monsoon storms have had their say). Each round takes less than an hour once you know what to look at.

Safety before you climb

Flat does not mean safe. Only go on the roof if you can do it safely: a sturdy ladder on level ground, soft-soled shoes that won’t scuff or puncture the membrane, dry conditions, and someone who knows you’re up there. Stay back from edges and parapets, and don’t walk on a roof that feels soft, spongy, or visibly sagging underfoot — that’s a sign of structural or saturation problems and a reason to call a professional, not to keep exploring.

If roof access is awkward or you’re uneasy at heights, everything below can be assessed from a ladder at the eave or parapet with a pair of binoculars. A ground-level inspection you actually do beats a rooftop inspection you keep postponing.

The membrane: seams, surface, and flashings

Start with the broad membrane surface and work toward the details.

Seams

Seams — where membrane sheets join — are the most common failure point on any flat roof. On single-ply roofs (TPO, PVC, EPDM), look for edges that are lifting, curling, or “fishmouthing” (gaping open at the ends). On modified bitumen, look for laps that are separating or blistering. A seam that looks raised, wrinkled, or bridged over a gap is worth watching — these are exactly the kinds of defects described in our guide to common causes of flat roof leaks.

Blisters, ridges, and punctures

Blisters — raised bubbles in the membrane — form when air or moisture gets trapped between layers. Small, scattered blisters are often cosmetic, but large or growing ones can split open. Ridges or wrinkles that weren’t there before can signal the membrane is shrinking or the substrate is moving. Punctures are the acute threat: fallen branches, wind-blown debris, dropped tools. Walk the roof in a grid pattern and look for anything sharp or anything that looks like it landed hard. Mark suspect spots with chalk or a photo — don’t try to patch them yourself with the wrong material.

Flashings and sealant

Penetrations — vents, pipes, skylight curbs, parapet walls — are where water most wants in. Check that metal flashing is still tight and seated, that termination bars haven’t pulled away from walls or curbs, and that the sealant around them isn’t cracked, crazed, or missing. Dried-out sealant is one of the cheapest problems to fix and one of the most common causes of leaks when it’s ignored.

Surface wear

On granule-surfaced modified bitumen, look for bare patches where the mineral surfacing has worn away — that’s the membrane’s UV armor thinning. On coated roofs, look for fine alligator-like crazing or areas where the coating has worn through. Intense high-desert UV ages exposed surfaces steadily, so surface wear is your early warning that the membrane is working unprotected. When a membrane is aging but still sound, restorative roof coatings can protect and extend it — but only an inspection can tell you whether your roof is a candidate.

Drainage: the part most inspections skip

Every flat roof inspection should include the drainage path. Clear debris from interior drains, scuppers, and gutters; check that strainer baskets are in place and seated; look for sediment or gravel buildup that slows water. Then watch how the roof drains — the simplest test is to look at it within a day or two after rain. Water that is still standing 48 hours after rainfall ends meets the NRCA’s definition of ponding water. Ponding accelerates membrane aging, adds weight (an inch of standing water weighs roughly five pounds per square foot), and probes every weak seam — which is why we’ve written a full guide to ponding water on flat roofs and what to do about it.

Don’t forget the inside

Inspect from below, too. Check ceilings and upper walls for stains, peeling paint, or bubbling drywall, and sniff for musty odors in rooms and closets under the roof. Remember that on a flat roof, the stain is rarely directly below the breach — water travels sideways through the assembly before it finds a way in. Interior signs tell you there is a problem; the rooftop inspection tells you where it is.

What a professional inspection adds

A homeowner inspection catches the visible. A professional inspection goes further: probing seams by hand, examining flashings up close, checking the underside of the deck where it’s accessible, and — when warranted — scanning for trapped moisture. Moisture surveys typically use infrared thermography, which detects temperature differences rather than moisture itself, so as Professional Roofing (the NRCA’s official magazine) notes, findings should be verified — usually with small core samples — before any tear-off decisions are made. A professional inspection should end with a written report: what was found, what’s urgent, what can wait, and what it will take to fix. When the findings raise bigger questions, our repair-versus-replacement guide helps you think through the decision.

Keep a record

Photograph what you find and note the date. A simple folder — phone photos plus a few lines of notes per inspection — becomes genuinely useful over time: it shows whether a blister is growing or ponding is getting worse, and it gives any roofer you hire a head start. Carlisle’s building-owner guidance emphasizes keeping maintenance records, partly because warranty coverage can depend on documented upkeep.

A flat roof inspection isn’t a test you pass or fail — it’s maintenance. The roof doesn’t need you to be an expert; it needs you to be regular. And when you find something that doesn’t look right, a professional assessment settles the question quickly. If you’d like one, request a roof assessment or call (505) 578-4300 — we’ll inspect your flat roof and give you an honest, upfront answer about what it needs.

Common Causes of Flat Roof Leaks

Every flat roof leak has a cause, and most of the time it’s one of a short list of usual suspects. Failed seams, bad flashing, ponding water, clogged drains — these account for the large majority of the flat roof leaks that roofers get called to fix. Knowing what’s on the list helps you in three ways: you can spot trouble earlier, you’ll understand your roofer’s diagnosis, and you’ll know which maintenance actually prevents leaks.

This isn’t a DIY repair manual. It’s a map of where flat roofs fail and why — so when water shows up inside, you know what the search looks like.

1. Failed seams

Single-ply membranes — TPO and PVC, EPDM — are installed as sheets joined at seams: heat-welded on TPO and PVC, adhered or taped on EPDM. Those seams are the most vulnerable linear footage on the roof. Every day, thermal cycling expands and contracts the membrane, working the seams; over the years, adhesion can fatigue, welds can separate, and tapes can lift — especially where water ponds or debris collects.

Seam failure often starts invisibly: a few inches of open seam that admits water with every rain. Because water travels laterally once inside, the interior stain can appear far from the failed section. Seam issues are a strong argument for professional inspection — finding an open seam takes a trained eye walking the roof systematically, not a glance from the ground.

2. Flashing failures at penetrations, curbs, and edges

Ask roofers where leaks come from and most will point to details, not the open field of the membrane. Flashings are the transitions where the membrane meets everything that interrupts it: vent pipes, HVAC curbs, skylights, parapet walls, drains, and roof edges. Each one is a custom waterproofing job, and each one moves — the building shifts, the membrane expands and contracts, sealants age and crack, metal flashing corrodes.

Common flashing problems include sealant that has dried and split, flashing that has pulled away from a wall or curb, and pipe boots that have deteriorated. In Rio Rancho’s climate, UV and thermal cycling age these details faster than the membrane field itself — the details work harder, so they wear out first.

3. Ponding water

Water that doesn’t drain becomes a leak-finding machine. The National Roofing Contractors Association (NRCA) defines problem ponding as water that remains on the roof 48 hours or more after rainfall ends. Standing water does three things: it exploits every weak seam and flashing gap through constant immersion, it adds significant weight to the structure, and it accelerates the aging of the membrane beneath it.

Ponding has several root causes. Sometimes it’s maintenance — clogged drains or scuppers (see below). Sometimes it’s structural — sagging areas between joists, or a roof built with inadequate slope. The distinction matters: maintenance ponding is fixable with a ladder and a trash bag; structural ponding may require corrective work at the replacement level. Either way, persistent ponding deserves attention long before it becomes a leak.

4. Clogged or damaged drainage

Flat roofs live or die by drainage. Interior drains, scuppers, gutters, and downspouts move water off the roof — and they’re magnets for leaves, dirt, bird nests, and monsoon debris. A clogged drain doesn’t just slow drainage; it creates ponding, and ponding creates leaks. Damaged components — cracked drain bowls, separated scupper flashing, disconnected downspouts — are just as bad.

This is the most preventable cause on the list, and the best argument for a maintenance mindset: keeping drainage clear is cheap, simple, and disproportionately effective. The NRCA recommends inspections at least twice a year, in spring and fall — and clearing drains sits at the top of every such inspection checklist.

5. Punctures and mechanical damage

Flat roofs get walked on — by HVAC technicians, satellite installers, holiday decorators, and homeowners retrieving a frisbee. Every footstep is a risk: dropped tools, dragged equipment, and sharp debris can puncture or abrade the membrane. Fallen branches and wind-blown debris do the rest, and hail, when it comes, can bruise or fracture membrane surfaces.

Many punctures are small and slow: a tiny hole that admits a little water with each rain, saturating insulation for months before the first stain appears. If your roof sees regular foot traffic, ask about walk pads — sacrificial pathways that protect the membrane along service routes. And after any work on the roof, it’s worth having the membrane checked: the service call that fixed your AC shouldn’t be the thing that floods your ceiling.

6. Age, UV, and weathering

Membranes don’t last forever; they age. Intense UV gradually breaks down exposed surfaces, and thermal cycling fatigues seams and details. This isn’t a defect; it’s a lifecycle. An aging membrane shows it: brittleness, surface cracking, shrinkage pulling at flashings.

The key question for an aging roof is whether it’s aging gracefully or failing. If the membrane is weathered but sound and dry underneath, restorative roof coatings or a spray foam roofing system can extend its service life significantly — these options exist precisely for roofs in this condition. If the membrane is brittle, saturated beneath, or failing at scale, that’s the replacement conversation. An assessment tells you which one you’re having.

7. Installation defects and incompatible repairs

Sometimes the cause was built in on day one: seams that were never properly welded, flashing installed without adequate height or adhesion, details finished with the wrong materials. These defects can take years to surface — a cold weld holds until thermal cycling finally works it open.

Repairs can introduce their own problems when materials don’t match: the wrong sealant on the wrong membrane, or a patch incompatible with the existing system, can fail quickly or even damage the surrounding membrane. The lesson isn’t to distrust repairs — it’s to make sure they’re done with compatible materials by someone who knows the membrane they’re working on.

8. Structural movement and deck problems

Less common but real: buildings move. Settling, sagging joists, or deflection under load create low spots — and low spots pond — while stressing membranes and flashings beyond what they were detailed for. If leaks recur in the same area despite good repairs, or ponding keeps returning to the same spot, the structure underneath deserves a look. The roof problem may be a building problem.

How these causes work together

Rarely is it just one thing. The typical leak story is a chain: an aging flashing that would have survived a normal rain, but clogged scuppers ponded water over it during a monsoon downpour — and the breach it finally opened sat in the membrane’s most UV-aged section. That’s why good assessments look at the whole roof, not just the obvious defect: fixing one link without checking the others is how leaks come back. And it’s why maintenance works — clearing a drain breaks the chain before it starts.

Putting the list to work: what you can check vs. what to leave to the pros

You don’t need to get on the roof to be useful. From the ground, a ladder at the edge, or a window with a view, you can check that scuppers and gutters aren’t visibly clogged, look for debris piles after windstorms, and watch for ponding that lingers more than a couple of days after rain. Inside, glance at your ceilings after major storms — early stains are small, and small is good.

Leave the membrane itself to professionals. Walking a flat roof to inspect seams and flashings takes training — and the wrong footstep on a compromised roof makes things worse. That’s what the twice-yearly professional inspection is for: the NRCA’s recommended cadence of spring and fall, plus after severe weather.

Found the cause — or can’t find it

If you’ve identified a likely culprit — a clogged scupper, a visibly failed flashing — you’ve done the useful part; the repair itself belongs to a roofer with the right materials for your membrane. If you can’t find it, that’s normal: most leak sources aren’t visible to the untrained eye, and they’re often far from the interior stain. Either way, the next step is an assessment that traces the problem to its source and scopes the fix — which is where our guide to flat roof repair vs. replacement picks up the story.

And if water is already inside, don’t wait for the diagnosis to start protecting your home: here’s what to do about ceiling water stains, and why a flat roof leak can’t wait. When you’re ready, contact us for a roof assessment — call (505) 578-4300 or reach out online — and we’ll track your leak to its source.

How Long Can a Flat Roof Leak Go Unrepaired?

It’s the question every homeowner with a new ceiling stain asks: how long can this go before I have to deal with it? A week? Until after monsoon season? Until next year? The honest answer is that there’s no safe waiting period — but that’s not a satisfying answer when you’re trying to plan. So here’s a more useful one: what actually happens inside your roof assembly over days, weeks, and months, and what makes that timeline faster or slower.

The short answer

No two leaks run on the same clock. A pinhole over a well-drained section in a dry month behaves nothing like a failed flashing under ponding water during monsoon season. The variables — breach size, location, roof assembly, drainage, weather — matter more than the calendar.

But one thing is constant: the damage is progressive and one-directional. Water doesn’t undo itself, and insulation doesn’t dry out inside a sealed assembly. Every stage below is worse than the one before it, and each stage costs more to fix. With that in mind, here’s how it typically unfolds.

Days: water gets in and spreads out

In the first days, water entering through the breach moves laterally between the membrane and the insulation, and begins soaking the insulation immediately around the entry point. From inside the house, you may see nothing at all — the water hasn’t reached your ceiling yet. This is the deceptive phase: the roof looks fine, the ceiling looks fine, but the assembly is already wet.

Small, slow leaks can sit in this phase for a while, especially in dry weather. That doesn’t mean they’re harmless — it means the damage is still hidden. A professional assessment at this stage usually finds a localized problem: a failed seam, a flashing gap, a puncture. The repair scope is at its smallest right now.

Weeks: the stain appears

Once water works through the insulation and deck to the ceiling, the first visible evidence shows up — usually a faint discoloration that darkens and grows. If you’ve found one, our guide to water stains on your ceiling walks through what to do next.

By the time a stain is visible, the insulation around the leak path is typically saturated well beyond the stain’s footprint. The repair is usually still a membrane-level fix plus localized insulation replacement — but the affected area is bigger than the stain suggests.

Months: saturation spreads

Given months, water keeps migrating. The saturated zone in the insulation grows outward from the entry point. The deck beneath stays wet — wood begins to soften and rot, metal begins to corrode. Inside, stains spread, paint peels, and the conditions for mold establish themselves in the persistently damp cavity.

This is the phase where the repair scope changes character: from patching a membrane to cutting out and replacing sections of the assembly. Each month of saturation adds square footage to that section. It’s also the phase where waiting starts forcing bigger decisions — the line between repair and replace moves as the damage spreads, which our repair vs. replacement guide explains in detail.

A year or more: structural territory

Leaks that go unrepaired for a year or longer can compromise the deck itself — rotted wood decking, corroded metal, degraded lightweight concrete. Interior damage is usually extensive by this point: ceilings, walls, flooring, and potentially mold remediation across affected areas. At this stage, you’re often looking at partial or full replacement rather than repair.

To be clear: roofs rarely collapse from a single leak. What happens instead is slower and more expensive — the assembly degrades section by section until patching no longer makes sense. Some roofs leak for years before the problem becomes undeniable. The bill grows the entire time.

What speeds the timeline up

Monsoon season

Volume matters. Rio Rancho’s monsoon downpours deliver enormous amounts of water in short bursts. A leak that barely registered in May can saturate a large area in a single August storm — especially if drains are clogged and water ponds over the breach.

Ponding over the breach

A leak under standing water is under constant immersion — water is being pushed into the breach around the clock, not just during rain. The NRCA defines problem ponding as water remaining 48 hours or more after rainfall. If the breach sits in a ponding area, the timeline compresses dramatically.

Clogged drainage

Debris in drains and scuppers turns every rain into a ponding event and keeps water on the roof longer. It’s also one of the easiest accelerants to eliminate — which is why drainage problems show up among the common causes of flat roof leaks.

Thermal cycling working the breach

The high desert’s day-night temperature swings expand and contract the membrane daily. That cycling stresses the breach itself — a small seam separation can grow as the membrane moves around it. The hole gets bigger while the water keeps coming.

Foot traffic and deferred maintenance

Walking on a compromised roof can enlarge the breach. And every maintenance item deferred — an unsealed penetration, a cracked flashing — is another potential entry point joining the first.

What slows it down (but doesn’t stop it)

Rio Rancho’s aridity can make a leak look intermittent: long dry spells let surface evidence dry out, and the stain may not grow for weeks. Don’t mistake a dry spell for a healed roof. Water trapped inside the assembly — between membrane and deck — doesn’t evaporate just because the air outside is dry. The leak is still there; it’s just waiting for the next rain. Intermittent symptoms are still symptoms.

The variables that matter most

If you’re trying to judge your own situation, these are the factors a roofer weighs:

  • Breach size. A pinhole and a torn seam are different problems with different clocks.
  • Location. A breach over a drain behaves better than one in a ponding zone; a breach near the roof’s edge may show inside faster than one in the middle of the field.
  • Assembly. What’s under the membrane — insulation type and thickness, deck material — determines how fast water spreads and how much damage it does.
  • Drainage. Clear drains buy time; clogged drains compress the timeline.
  • Weather. Monsoon season accelerates everything; dry months mask it.
  • Roof condition. A sound membrane with one breach is a different case from a deteriorated membrane with many.

No formula combines these into a safe waiting period — but together, they’re what your assessment will evaluate.

If you must wait: how to limit the damage

Sometimes life intervenes — a contractor’s schedule, a budget gap, a storm in progress. If you can’t get a permanent repair immediately, here’s how to keep a waiting period from becoming a disaster:

  • Protect the interior. Contain drips, move valuables, and keep your distance from any bulging ceiling areas.
  • Keep water moving off the roof. Clear debris from drains, scuppers, and gutters — safely, from a ladder or the edge, not by walking a wet membrane. Every gallon that drains is a gallon that isn’t ponding over the breach.
  • Document the progression. Dated photos of stains and any visible roof issues help your roofer assess how fast things are moving.
  • Don’t try to seal it from inside. Interior caulk and paint don’t stop water entering above — they just hide the evidence while the assembly keeps soaking.
  • Get a professional assessment on the calendar now. Even if the repair has to wait, knowing the scope — and whether temporary professional protection is warranted — turns waiting into a plan instead of a gamble. Contact us to schedule a roof assessment.

The real cost of waiting

Think of it as scope, not just dollars: a week might mean a patch; months can mean section replacement; a year or more can mean structural work and interior restoration. You won’t find exact prices here — they vary too much to print honestly — but the direction is unambiguous. Every stage of delay converts a smaller, cheaper repair into a larger, more expensive project. Acting early doesn’t just save money; it preserves your options, including middle-ground solutions like restoration that disappear once the assembly is saturated.

The bottom line

How long can a flat roof leak go unrepaired? Technically, until the roof or your patience gives out. Practically, every week you wait trades a smaller problem for a bigger one. The leak won’t wait — but you control how much damage it does by how quickly you respond. Get it assessed, get it scoped, and get it fixed while the fix is still small.